How to access your email account from Webmail
You can access your email account directly from Webmail in your browser.
Step 1
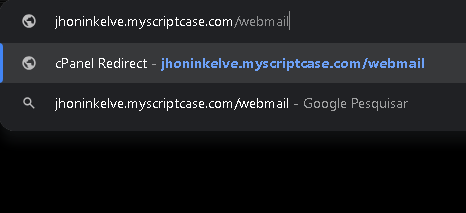
1. Open your browser and type "Your_domain/webmail" or "webmail.Your_domain". Replace "Your_domain" with your domain name.

Step 2
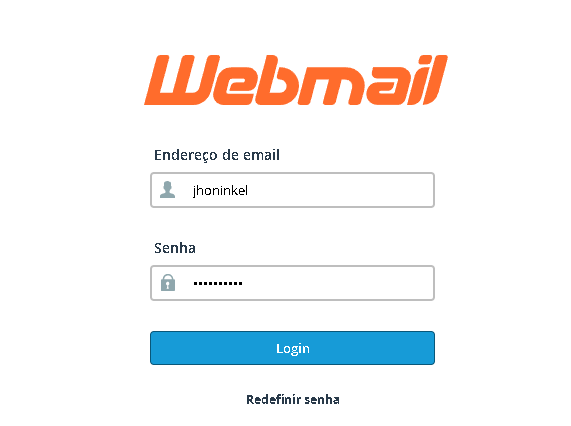
On the login screen, enter your full email address and password, then click the "Login" button.

Step 3
Step 1
1. Open your browser and type "Your_domain/webmail" or "webmail.Your_domain". Replace "Your_domain" with your domain name.
Step 2
On the login screen, enter your full email address and password, then click the "Login" button.
Step 3
You will be redirected to a cPanel webmail page.
Now you must select the email manager, like "Roundcube" for example.
Once your Webmail Email Reader is opened, you can read your email and check your email inbox and junk mail.
Hope this helps !
Related Articles
JetBackup 5 - Email Accounts : How to restore an email account
Jetbackup 5 has a new interface, with better usability and new options, making it easier to search for specific items. In this article we will see how to restore an email account to a cPanel account. First we must access cPanel and navigate to the ...How to change the password of a email account
If you want to change password of your email account then you can do this by the following steps: 1. Log into your cPanel account. 2. In the "Mail" section click on "Email Account" Icon. 3. Scroll down to the "Email Accounts" section and you should ...Email Disk Usage
First you must access your cPanel: See how to obtain credentials and access cPanel through our article: https://help.scriptcase.net/portal/en/kb/articles/first-steps-with-the-hosting-access Logged into cPanel, in the email tab, Select Email Disk ...How to reset the password of your email account
Through the cpanel access "Email > Email Accounts". Choose the email you want to change your password, and click "Manage". Now you can fill in a new password, or click on "Generate" so that the system generates a new password. And click "Update Email ...How to create email accounts
To create email accounts you need to have access to cPanel. Step 1 The first step will be to log in to your cPanel panel. Within your cPanel you must locate the Email section and then go to the "Email Accounts" item. Step 2 On this screen, you must ...