Cómo utilizar el DNS público de Google
Cuando su conexión es mala o incómoda, el problema no se encuentra en el servidor del Sistema de nombres de dominio (DNS). Transforma sitios web con direcciones "hermosas", como scriptcase.com, en sus respectivas direcciones IP para que su ISP las lea.
Si el DNS del proveedor está sobrecargado, las páginas pueden ser muy lentas. En este caso no es culpa de internet.
Ahora presentaremos formas de realizar cambios de DNS en cada sistema operativo.
Windows 10
1 - Abra el menú de inicio y haga clic en Configuración, representado por el símbolo del engranaje.
2 - Entra en Redes e Internet.
3 - Haga clic en la pestaña Wi-Fi (incluso si está conectado al cable).
4 - Desplácese hasta el final y haga clic en Cambiar opciones del adaptador.
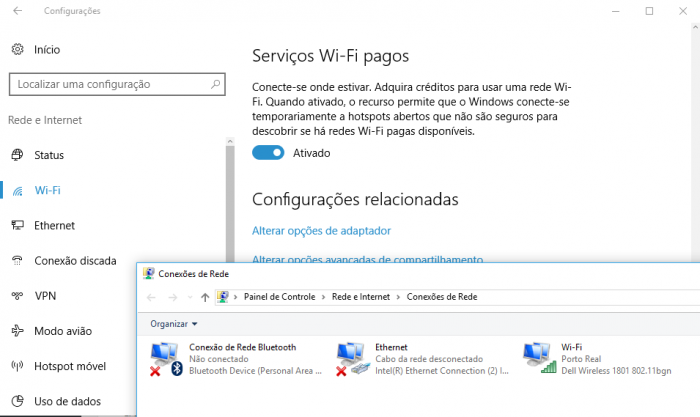
5 - En tu conexión, haz clic derecho.
6 - Haga clic en Propiedades.
7 - Autorice el acceso con su contraseña de administrador.
8 -En la ventana que se abre, busque el Protocolo IP versión 4 (TCP/IPv4) y haga clic en Propiedades.
9 - Habilite la opción Usar las siguientes direcciones de servidor DNS.
10 - Ingrese las direcciones DNS preferidas y secundarias.
Las direcciones DNS de Google son las mejores para usar en este caso. Son 8.8.8.8 y 8.8.4.4, respectivamente.
macOS
1 - Haga clic en la manzana Apple en la esquina superior izquierda.
2 - Ingrese a Preferencias del Sistema y seleccione el menú Red.
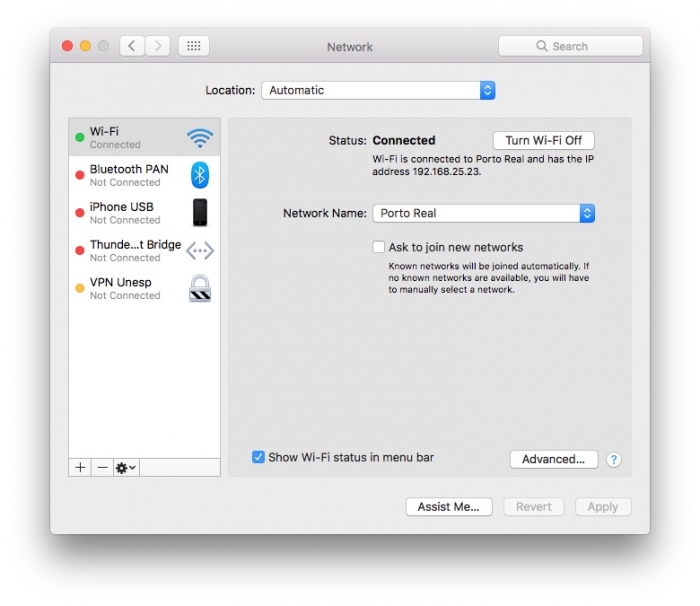
3 - Seleccione el tipo de conexión que está utilizando (como Wi-Fi).
4 - Haga clic en el botón Avanzado e ingrese a la pestaña DNS.
5 - Elimine todas las direcciones que están en la tabla de la izquierda y haga clic en (+) para agregar nuevas.
6 - Utilice las direcciones de Google mencionadas anteriormente.
Related Articles
Cómo cambiar el DNS de su dominio a Scriptcase Host
Para cambiar el DNS para el host de Scriptcase, siga estos pasos: Acceda a la configuración de DNS del dominio: Inicie sesión en el panel de control del proveedor donde está registrado el dominio (por ejemplo: Registro.br, etc.). Localice la sección ...Cómo enviar una base de datos Firebird a su cuenta de hosting
Si ya tiene una base de datos Firebird y desea cargarla en su cuenta de hosting, simplemente siga los siguientes pasos: Paso 1 1. Guarde/exporte su banco local con su usuario de acceso de hosting. La contraseña debe contener exactamente 8 caracteres, ...Monitorizar DNS
Las herramientas de red permiten al usuario encontrar información sobre cualquier dominio o rastrear la ruta desde el servidor en el que reside el sitio web hasta la computadora desde la que accede a cPanel. Paso 1 Ingresado a su cPanel, en la ...JetBackup 5 - DNS Zones : Cómo restaurar una zona DNS
Jetbackup 5 tiene una nueva interfaz, con mejor usabilidad y nuevas opciones, lo que facilita la búsqueda de elementos específicos. En este artículo veremos cómo restaurar una Zona DNS desde una cuenta de cPanel. Primero debemos acceder a cPanel y ...Cómo usar el Administrador de archivos y cargar un archivo
Y no desea utilizar un software FTP de terceros, puede utilizar Administrador de archivos cPanel. 1. Inicie sesión en su cuenta de cPanel. 2. En la sección "Archivos", haga clic en el icono "Administrador de archivos". 3. Una vez en la interfaz del ...