How to use the Google Public DNS
When your connection is bad or awkward, the problem is not found in the Domain Name System (DNS) server.
We will now present ways on how to perform DNS change on each operating system.
Windows 10
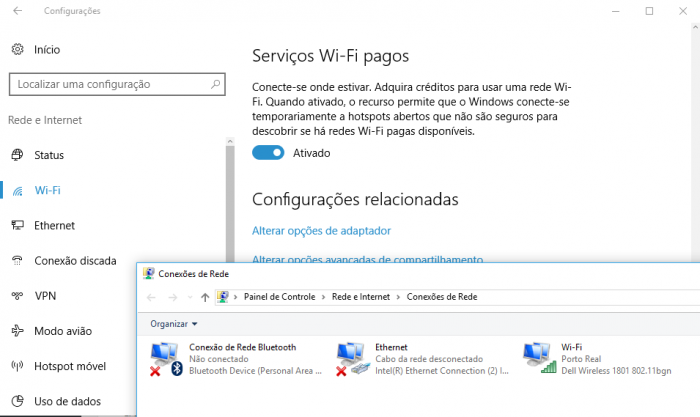
1 - Open the start menu and click Settings, represented by the gear symbol.
2 - Get in Network and Internet.
3 - Click on the Wi-Fi tab (even if you are on cable).
4 - Scroll to the bottom and click Change Adapter Options.

5 - On your connection, right click.
6 - Click on Properties.
7 - Authorize access with your administrator password.
8 - In the window that opens, look for IP Protocol Version 4 (TCP / IPv4) and click Properties.
9 - Enable the Use the following DNS server addresses option.
10 - Enter the preferred and secondary DNS addresses.
Google's DNS addresses are the best to use in this case. They are 8.8.8.8 and 8.8.4.4, respectively.
macOS

1 - Click on the Apple apple in the upper left corner.
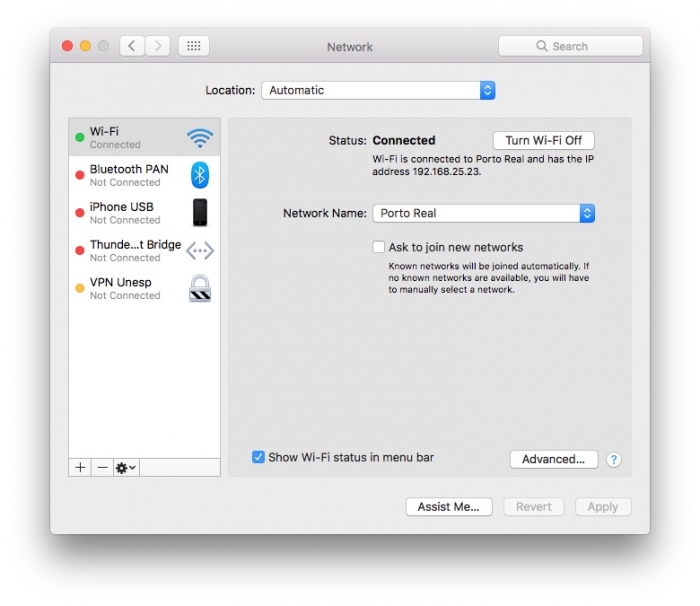
2 - Enter System Preferences and select the Network menu.
3 - Select the type of connection you are using (such as Wi-Fi).
4 - Click the Advanced button and enter the DNS tab.
5 - Delete all addresses that are in the left table and click (+) to add new ones.
6 - Use the Google addresses mentioned above.
Related Articles
JetBackup 5 - DNS Zones : How to restore a DNS zone
Jetbackup 5 has a new interface, with better usability and new options, making it easier to search for specific items. In this article we will see how to restore a DNS Zone from a cPanel account. First we must access cPanel and navigate to the ...Track DNS
Network tools allow the user to find information about any domain or trace the path from the server on which the website resides to the computer from which they access cPanel. Step 1 Entered into your cPanel, in the “ADVANCED” tab, locate the “DNS ...How to use GMAIL SMTP in hosting applications
To allow sending email through domains on the web by gmail it is necessary to perform the steps below: 1 - Access the item https://myaccount.google.com/lesssecureapps , to allow the login from less secure applications . 2 - Access ...How to use File Manager and upload a file
If you don't want to use a 3rd party FTP Software, you can use the cPanel's inbuilt File Manager. 1. Log into your cPanel account. 2. In the "Files" section, click on the "File Manger" Icon. 3. Once in File Manager ...How to change the DNS to Scriptcase Host
To change the DNS for the Scriptcase host, follow these steps: Access the domain's DNS settings: Log in to the control panel of the provider where the domain is registered (e.g. Registro.br, etc.). Locate the DNS or DNS Zone section: Look for ...