Connecting with Firebird on macOS - PHP 7.3
Prerequisites
If you are using a manual installation on MacOS, you will need to install PHP and the Firebird driver will be enabled. Click here to see how to do this.
1 - Check that the Firebird driver is enabled in your Scriptcase diagnostics. Here is how to locate your diagnostics below and verify that the driver is enabled.
- By going to the top menu Help > Diagnostics, you can easily find it through the interface.
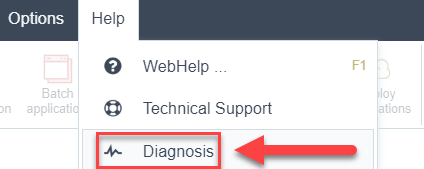
- Or, by accessing your Scriptcase installation path:
127.0.0.1/scriptcase/diagnosis.php or domain.com/scriptcase/diagnosis.php
Creating a connection in Scriptcase
1 - Access any project from your Scriptcase.
2 - Click on the New connection icon to create a connection.

or go to the Database > New Connection menu.
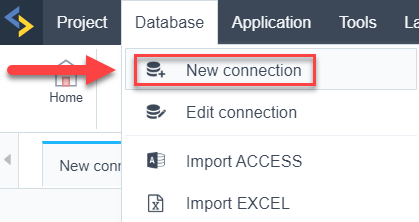
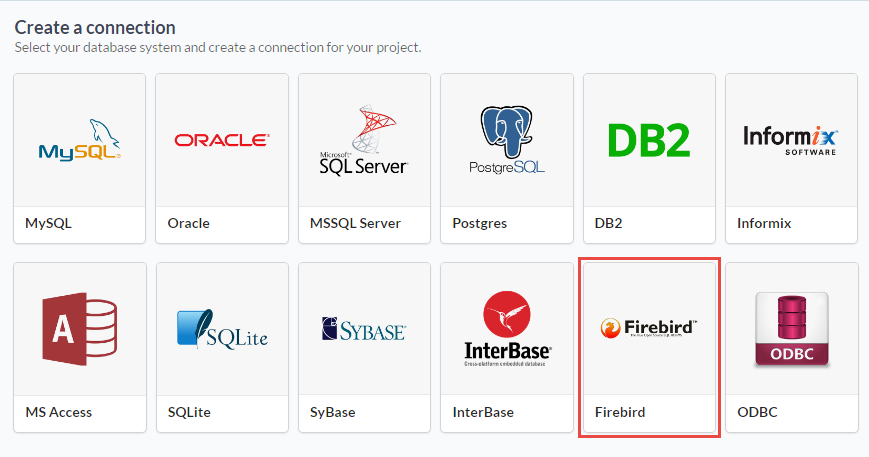
After that a new page will appear with all the database connections.
3 - Select the Firebird connection.
Connection
Enter the parameters for connecting to your Firebird database as follows:
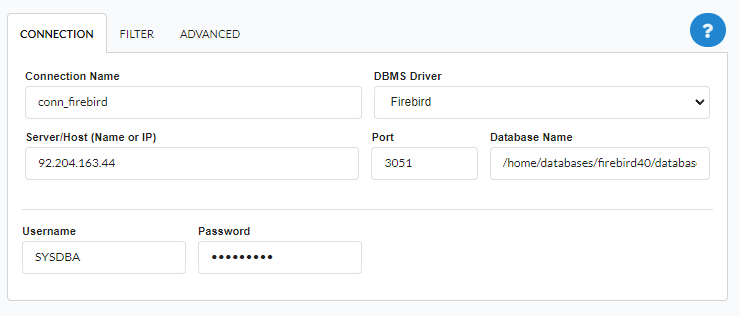
Connection Name: Set the name of your new connection. By default, Scriptcase adds the prefix conn along with the database name.
DBMS Driver: Select the Firebird Driver used to connect. In this example we use the Firebird Driver.
- Server/Host (Name or IP): Enter the IP or domain of the server where the database is installed.
- Ex:
serverdomain.comor192.168.254.170.
- Ex:
- Port: Enter the numeric port for your database server.
- Ex:
3050
- Ex:
Database Name: Enter the database created for use by the entered user.
Username: Enter the user to authenticate the connection to your Firebird database.
Password: Enter the password to complete the authentication process.
- Test Connection: Click this button to get a response from Scriptcase request to know if the entered parameters are correct.

Filter
By accessing this tab, you can configure which items from the Database will be displayed in the connection, depending on the owner or not.

Show
Allows the Firebird connection to see tables, views, system tables and procedures depending on the items selected by the user. By default, the items Tables and Views are already selected by Scriptcase.
- Tables: By selecting this option, the tables in your database will be displayed.
- By default, Scriptcase enables this option.
- By default, Scriptcase enables this option.
- Views: Selecting this option will display your database views.
- By default, Scriptcase enables this option.
- By default, Scriptcase enables this option.
System tables: By selecting this option, the system tables of your database will be displayed.
- Procedures: When you select this option, the procedures from your database will be displayed.
Searches
Allows you to define which tables and owners are displayed.
- Tables: You can define in this option which tables are displayed. The setting can contain a
PREFIX%or name of the tables to be displayed.- By default, Scriptcase leaves this option empty.
- Ex:
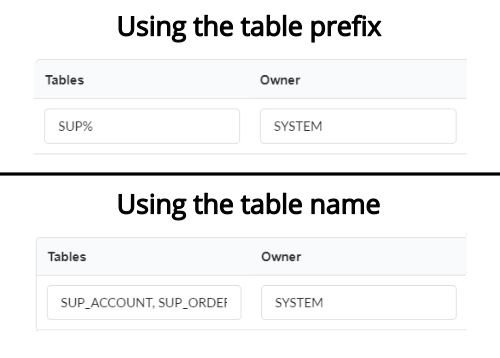
- Owner: Inform the user who sees the inserted tables for display.
- User must be in capital letters, as in the example above.
- User must be in capital letters, as in the example above.
- Show: Choose whether tables are displayed for the owner entered.
NOTE: By using table filtering, you eliminate unnecessary tables for your project and improve the performance of your database connection.
Advanced
In this tab, you have access to connection-specific settings. Changes made in this section impact the data display and performance of the application.
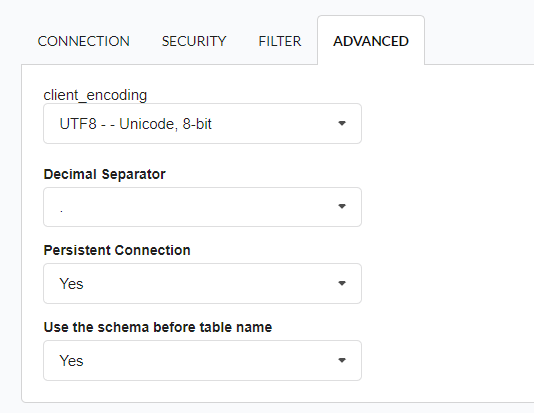
client_encoding: Select the encoding used in your database. In the example above, we used client_encoding UTF-8.
- Decimal Separator: Select the separator type for decimal records, between comma and period.
- By default, period
.is selected as the separator.
- By default, period
- Persistent connection: Set whether connections will be closed after your scripts run in Scriptcase applications.
- By default, Scriptcase disables this option.
- By default, Scriptcase disables this option.
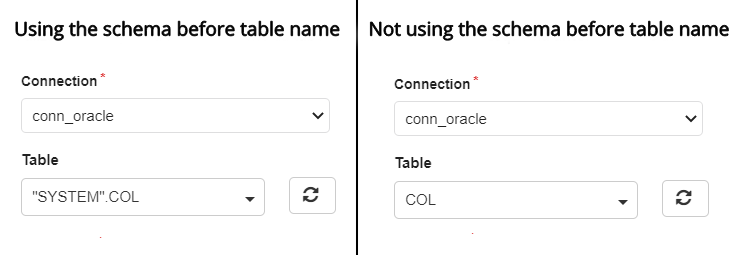
- Use schema before table name: Set whether the database schema is displayed before table names.
By default, Scriptcase enables this option.
Ex:
Related Articles
Connecting with Firebird on Windows - PHP 7.3
If you are using a manual installation on Windows, you will need to enable the Firebird extensions in the php.ini file. See below for how to do this. 1 - In the `php.ini` file uncomment the line for the Firebird extension php_pdo_firebird by removing ...Connecting with Firebird on linux - PHP 7.3
Prerequisites If you are using a manual installation on Linux, you will need to install the Firebird php extension. See below for how to do this. 1 - Log into your Linux terminal and type this line below according to your operating system to install ...Installing PHP 8.1 - MacOS
This documentation will cover how installing PHP 8.1 and ScriptCase manually on macOS. Performing this type of installation is your responsible for configuring your entire environment as well as database extensions. Listed below are versions of macOS ...Installing PHP 7.3 - macOS
This documentation will cover how to install PHP 7.3 and ScriptCase manually on macOS. Performing this type of installation is your responsible for configuring your entire environment as well as database extensions. Listed below are versions of macOS ...Installer for macOS - PHP 7.3
The Scriptcase installer installs Apache, PHP and Scriptcase on your operating system. The installer does not include a database Prerequisites To download the Scriptcase Installer, go to our download page clicking here. IMPORTANT: The Scriptcase ...