Autoresponders
With this item it is possible to configure automatic responses for all emails received, ideal for confirming receipt, informing travel periods, for example.
Firstly, let's access your cPanel panel.
Step 1After accessing cPanel, go to the Email section, there look for the item 'Automatic responders'
Step 2
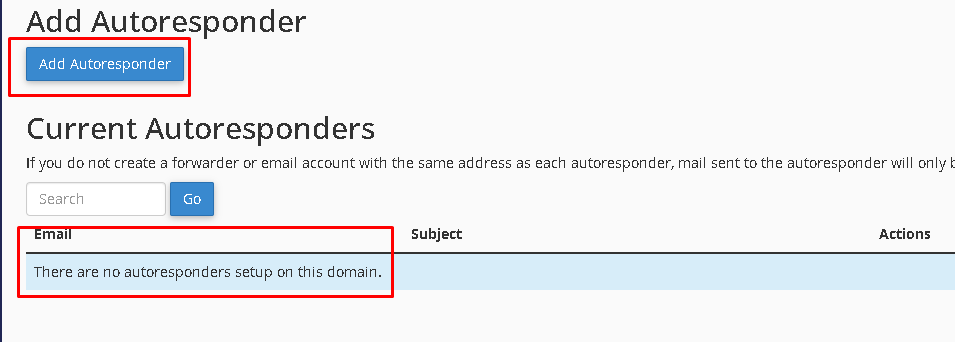
On this screen you can create a new respondent by clicking on 'Add automatic respondent' or add an existing respondent where the 'Current respondents' option is displayed.
Step 3
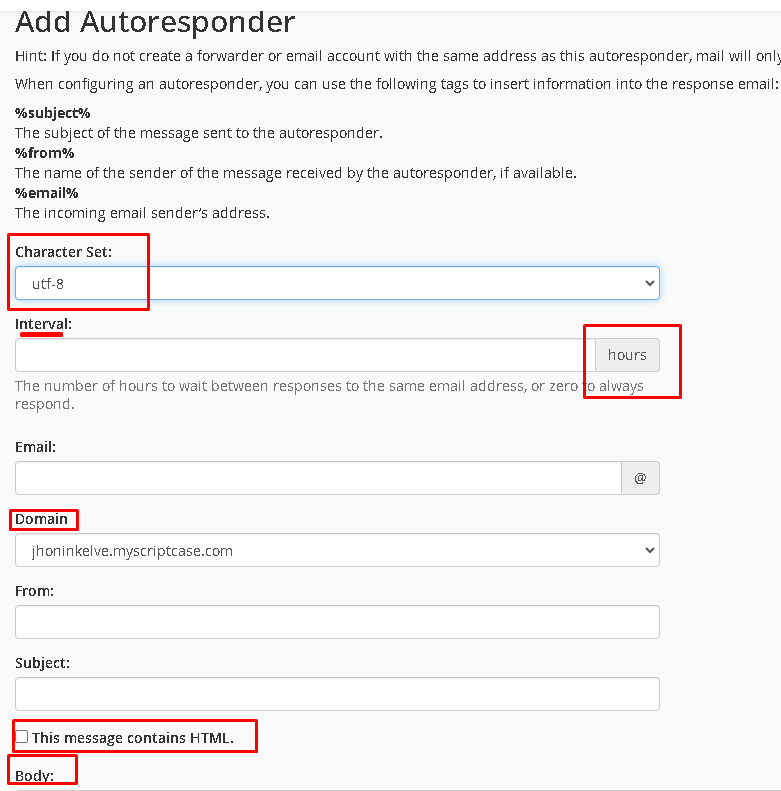
To add a new respondent, you must now configure the settings for sending the automatic response:
Character set: UTF-8 is defined by default
Range: According to your needs.
E-mail: The e-mail that will be registered for the automatic response.
Domain: The domain from which you will create the responder.
From: Name of person responsible for the email.
Step 4
Now define when it starts:
Start: With options to activate immediately or customize a start date.
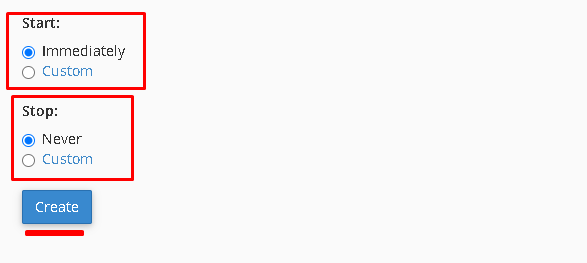
Stop: With options to deactivate immediately or customize a deactivation date.